Airtightness testing - the man with the fan..!
Early last week we took up an offer to have the house tested for airtightness by the Leeds Met. Uni's Centre for the Built Environment. Unlike in England, such test are not (yet) a requirement of building reg's in Scotland, but given that we are aiming to achieve the AECB's Silver standard I was keen to ensure we were at the very least close to our design target!So how do we measure airtightness? Until Friday, this was a mystery - then it all fell into place; method as follows:1. Close all trickle vents, windows and doors, fill all drain/water traps.2. Open main door of house and fit blower fan sealed within frame.3. Switch on fan and measure air flow rate into house (in m.cu. per hr) when air pressure in house is a steady 50 Pascals higher than outside.4. Record this flow rate and divide by surface area of house. Hey presto, this give the air permeability figure in m3 per m2 per hr - or m/hr.The results? Pretty good for a first test appeared to be the concensus. Under the current building reg's in England, the number has to be less than 10; ours was 4.8. Put another way, if we add up all the gaps in our building we have a hole the size of a dinner plate between us and fully airtight.However, the AECB's Silver target level is 3.0 for a house using a Mechanical Extract Ventilation system, or 1.5 for MVHR (our option); in other words we need to try and reduce our dinner plate to a saucer!So where do we look? Thermal imaging and smoke tests under pressure showed airflow through the service void, all of which are connected to the 1st floor joist void and loft space. This leads me to suspect we have some leakage at the soil vent pipe penetrations and possibly the airtightness membrane joints within the loft. Another significant 'problem' is clearly the seals around the large sliding patio doors, of which we have three sets, and which were actually letting water in last week during a driving rain storm. Our tester reckoned that sorting the doors alone could bring our figure down a futher 1 to 2 m/hr, getting us much closer to our target. Other issues included leaks between plasterboard and window frames.As a postscript to this, today I noticed a 1.5 inch waste pipe in the kitchen open to the elements with a gale blowing out of it into the house which we had omitted to seal; so that's an egg cup off our dinner plate!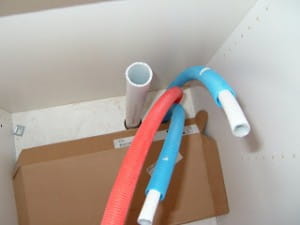
The ideal low energy house?
What we've set out to do at ECF is to build a house which will use 70% less energy than one built to current building regulations. Its timber frame construction detailing hasn't wavered too far from the 'norm' to present any major problems for a timber frame kit manufacturer, decent building contractor or building control, and the costs of going this 'extra mile' haven't been excessive to the extent that they will be paid back within a decade in terms of reduced energy costs.
In essence, we have built to a standard which is accessable now by most contractors and self builders which is around 5-6 yrs before its time if the UK Government is to fully implement its Code for Sustainable Homes (CSH) strategy, on which this building should come in at around 3-4 on a scale of 1-6. There is clearly some distance to go from this to 'zero carbon', so what represents the 'optimum' for 'Level 6 living', the magical zero carbon level required by 2016 for all new homes?
Well, the same principles apply, namely...
- building orientation to maximise solar gain in winter, spring and autumn whilst avoiding overheating in summer
- high levels of insulation around the entire building envelope
- high levels of airtightness coupled with heat recovery ventilation
- highly insulated and well sealed doors and windows
...but for CSH level 6 the wall insulation would need to be increased to >300mm (from our 200mm), roof insulation to >450mm (from our 350mm) and windows to be triple glazed krypton filled units with insulated frames and glazing spacers (vs. our argon filled double glazed units). This would result in a building which could feasibly rely on the heat given off by its occupants and collected though its windows to keep it at a comfortable temperature without having to introduce a heating system. Construction might rely on internal masonry/concrete walls to store heat and keep a steady internal temperature, with the insulation fixed to the outside of this.
On the face of it quite simple, but a seriously long way from what the UK housebuilding industry is used to. Roll on 2016.....there is a lot of catching up to do and mindsets to be re-programmed.
Ventilation strategies

As for living comfort at the levels of airtightness we are building to, it becomes necessary to use a whole house ventilation system. For this there are two main options; Mechanical Extract Ventilation (MEV) and Mechanical Ventilation with Heat Recovery (MVHR).
MEV uses a constantly operating fan which extracts warm moist air from the warm moist rooms (ie. bathrooms, kitchen etc) via ductwork, with fresh air effectively being sucked in via trickle vents and gaps in the structure. MEV is fairly economic to install, especially as it eliminates the need for dedicated extractors in the bathrooms. However, for very airtight buildings additional openings in the structure need to be introduced and warm stale air is replaced with fresh but cold air, thus driving heat out of the building and reducing its efficiency. As an aside to this, an MEV option is available for our heat pump which actually uses the heat from the outgoing stale warm air to pre-heat the ‘brine’ before it goes into the heat pump, thus recovering some of that energy. This is a great idea and an option well worth considering for self builders opting for a heat pump, but we eliminated it on the basis that that our first floor is largely unheated and such a system might lead to the cooling of that area via the trickle vents in the Velux windows which would need to be open for this system to work properly.
MVHR combines MEV with an intake system which supplies the ‘dry’ rooms with fresh air, preheated via a heat exchanger which takes heat from the extracted air. This is the system we have chosen, a (claimed) 95% efficient unit made by Dutch company Renovent and supplied by Ubbink in the UK. The unit has three settings and is virtually silent in operation. At the lowest setting (normal operation) it uses just half the power of a 60W light bulb and should be adequate to ‘heat’ the three first floor bedrooms alongside the heat convected from the ground floor. Other advantages are good air quality by using fresh, filtered air from outside, and the ability to use the unit to provide cooling in summer by bringing in cool air at night into a solar heated building.
Airtightness details
Having specified and designed a house to meet the AECB’s Silver Standard, airtightness plays a key role alongside high levels of insulation to achieve a low energy house. In our case we have followed the AECB’s Silver Standard construction details for timber frame buildings which advises the use of a continuous air/vapour control layer inside the building with all joints lapped, sealed and mechanically trapped.
This has probably been one of the most difficult aspects to achieve on site for our construction team which, in common with most UK builders, is simply not used to working to such a tight specification. With this in mind we opted for a solution which has largely avoided the need for specialist tapes and sealants, and in the main relies on the mechanical trapping of taped and lapped joints to provide a positive seal along with silicone sealant. We won’t really know how well this has worked until we do an airtightness test on the building, but on the basis that opening the front door feels somewhat akin to opening the door of a luxury car (ie. that air suction noise!) gives me some confidence. Also when it’s blowing a gale outside, there are no obvious draughts entering the building apart from the open trickle vents (shutters not yet fitted) and the yet to be connected stove flue.
Storms & membranes

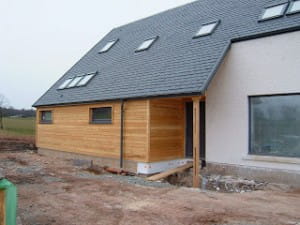
Once again, now the joiners have finished the roughings (plasterboard etc) inside the house and are ready to move on with the larch cladding outside, we’re getting battered by gales and rain. Nevertheless, despite getting a soaking in their first ten minutes outside yesterday Craig and David did one wall of the three to be larch clad and we’re delighted with the results. Ironic really, as the larch which the kit company sent was completely the wrong profile to what we specified, but we actually quite liked it and went with it!
The profile specified was ‘bevelsiding, which is wedge shaped in cross section and simply overlaps the board underneath. But we were sent a more robust tongue and groove profile which interlocks with adjacent boards, a detail which I feel adds a more robust line of defence against the weather.
Talking of which, my mind has been considerably exercised recently as to whether we really needed a layer of breather membrane on the outside of the woodfibre board cladding, something I really need to get off my chest on the blog and hopefully solicit comment. As a reminder to construction detail geeks who are still with me, from inside to out our wall build up is as follows:
Plasterboard
Battens to form 25mm service void
Polyethylene airtightness/vapour control membrane (VCL)
OSB3 (‘stirlingboard’) racking board
140mm structural frame
60mm Pavatherm Plus woodfibre board
Vapour open breather membrane
50mm Cavity
Brick / larch cladding (this outer layer often referred to as ‘rainscreen’)
The problem with the breather membrane is that it has a tendency to be blown off in high winds when exposed, as the staples don’t get a good fix into the Pavatherm boards. Once the bricks are up however, it is properly fixed back with large plastic washers which are clipped onto the wall ties, and of course it is fixed in place in the timber areas by vertical battens. Inspecting the cavities from unfinished window reveals shows this solution to be just fine (looks rather like a quilt!).
On the minus side there is the cost of material and about a day of labour to fix it on, plus a fair degree of effort in marking out where the studs are so the brickies know where to bang in the wall ties. On the plus side however it does add that extra line of defence against the outside world, and at the very least has provided a good degree of protection to the structure during construction prior to the rainscreen being built up.
Breather membrane is a ‘must do’ detail in standard timber frame construction which has the following build up:
Plasterboard
VCL (or this and the above are replaced with foil backed plasterboard)
140mm or 89mm structural timber frame
OSB racking board
Breather membrane
Cavity
Rainscreen
The conundrum is that the suppliers of Pavatherm advise that the breather membrane is not required as the outer layer of this board is water resistant, but also say its not a problem if a membrane is used!? So has it been worth the effort to add this extra layer? On balance yes, but only on the basis that we are building on a very exposed site.
Search and book
Tags
animals architectural design awards, cottages, sustainability bees caravan cottages Curlew Cottage days out design dogs eastcambusmoon electric vehicles foundation fruit and veg production furniture gold award great review green toursim hard landscaping heat pump heat recovery hens holiday accommodation insulation interiors lambing landscaping loch lomond low energy measures national park nature outings owls people photoshoot roof solar PV timber frame Training ventilation walks website windows
Blog archive
- June 2019 (1 entry)
- February 2019 (1 entry)
- December 2018 (1 entry)
- November 2018 (1 entry)
- April 2018 (1 entry)
- December 2017 (1 entry)
- October 2017 (2 entries)
- June 2017 (1 entry)
- April 2017 (2 entries)
- March 2017 (1 entry)
- February 2017 (1 entry)
- February 2016 (1 entry)
- June 2014 (1 entry)
- June 2013 (1 entry)
- April 2013 (1 entry)
- February 2013 (1 entry)
- May 2012 (2 entries)
- April 2012 (1 entry)
- March 2012 (2 entries)
- December 2011 (1 entry)
- August 2011 (2 entries)
- June 2011 (4 entries)
- May 2011 (4 entries)
- April 2011 (1 entry)
- December 2010 (4 entries)
- October 2010 (2 entries)
- August 2010 (2 entries)
- December 2009 (1 entry)
- November 2009 (2 entries)
- October 2009 (2 entries)
- September 2009 (3 entries)
- August 2009 (1 entry)
- July 2009 (2 entries)
- June 2009 (3 entries)
- May 2009 (7 entries)
- April 2009 (2 entries)
- March 2009 (2 entries)
- February 2009 (1 entry)
- January 2009 (4 entries)
- December 2008 (2 entries)
- November 2008 (1 entry)
- June 2008 (5 entries)
- May 2008 (4 entries)
- April 2008 (11 entries)
- March 2008 (14 entries)
- February 2008 (9 entries)
- January 2008 (12 entries)
- December 2007 (11 entries)
- November 2007 (11 entries)
- October 2007 (10 entries)
- September 2007 (6 entries)
